Player guides
DayZ guides for getting started and getting ahead on Is Dead. Search, filter by topic, or open any guide to read it.
From fresh spawn to endgame
New to Is Dead? There's no required path, but this one works. Take your time: the journey is where most of the fun happens.
- Gear upHit police stations and hunting camps. Skip military areas for now.
- Run questsCash, supplies, and rare items. Press O for the Quest HUD.
- Earn moneyHunt, mine, and loot AI, then sell at the trader hub or the P2P market.
- Buy a carYour first big goal: storage on wheels and faster travel.
- Build a baseRaise a flagpole, build a small cabin, add storage barrels.
- Go endgameT5+ zones, heli crashes, airdrops, endgame tickets, and crafting.
Traders buy. They don't sell gear. You cash in what you hunt, mine, and find, then earn weapons, armor, and endgame gear out in the world. That keeps the endgame worth chasing all wipe.
Keys to remember
- BServer book: info, crafting, rules, your stats
- OQuest HUD: objectives, hints, cancel
- MMap, including the Group tab
- F6Flip your vehicle or heli (driver's seat)
- ↓Turn on snapping while placing a kit
- PgUpPgDnRaise or lower the hologram
Your first steps on Is DeadPick a map, set up Discord, and follow a simple path from fresh spawn to established survivor.
Before you spawn, join the Discord and set your nickname to match your in-game name. Names need at least three English characters, and "Survivor" isn't allowed. Then pick a map:
- Chernarus: our flagship and the most well-rounded experience, with rotating PvP zones. A good place to get a taste of everything.
- Livonia: fully PvE, built around survival, exploration, and progression without worrying about PvP.
- Sakhal: hardcore survival with environmental danger and harder progression. Not for the faint of heart.
In game, press B to open the book. It holds server info, crafting info, links, the rules, and a player tab showing how your character is doing.
There's no required path, but this one works well:
- Gather basic survival gear
- Complete a few quests
- Start earning money
- Visit the trader hub and learn the economy
- Buy a vehicle
- Gather resources
- Build a flagpole and your first cabin
- Improve your gear
- Move on to advanced and endgame content
You don't need to rush. The journey from fresh spawn to established survivor is where most of the fun happens.
Your first hourWhere to go first, what to grab, and which places to avoid.
The quickest way to die on Is Dead is to run straight for a military base. AI there scale with the loot tier, and a T4 area is far more dangerous than a T1.
- Start at police stations and hunting camps. They often have a sidearm, ammo, and clothing, and the AI around them are easier.
- Cover the basics: food, water, a knife or axe, a backpack, bandages, and matches.
- Then take a few quests on Chernarus or Livonia before you step up to military areas.
If you get stuck, open a ticket in Discord rather than asking in global chat.
Making money earlyHunting, mining, AI, and quests are the most reliable ways to earn.
- Hunting: kill, skin, and sell meat, pelts, and skulls to the Hunter in the trader hub. It keeps you fed too. Pelts can be stored inside skulls to save space.
- Mining: a steady, low-risk option once you have tools. Gather ores and raw materials, then sell or process them at the Mining Buyer in the trader hub. The rocks help if you're building.
- AI encounters: AI can carry sellable armbands, tools, food, cash, ammo, and crafting materials. As your gear improves, they become one of the most rewarding activities.
- Quests: one of the fastest ways to establish yourself, with rewards like cash, building supplies, weapons, and rare items.
Your first big goal should be a car. Lower-tier cars are affordable and give you mobile storage, faster travel, and easier hauling. You can buy your first one at the civilian vehicle trader.
Quests: how they workUsing the Quest HUD, finding the next step, and getting unstuck.
Quests are a different way to earn gear, building supplies, and rare loot through custom challenges. Most are designed for solo play, though some are easier with help, and chains get harder as you advance. They're available on Chernarus and Livonia.
- Quest HUD: press O to open it (rebind it in your controls if needed). View objectives, hints, and progress, toggle the tracker overlay in the top-right, or cancel a quest.
- Finding the next quest: if you finish one and see no marker over an NPC, interact with them anyway. Some chains send you back to a previous NPC, others to a new one.
- Weapon-specific kills: use the required weapon and avoid heavy attacks. Sometimes a kill won't count even when you do everything right, so keep trying.
- Shared NPCs: if a quest giver is blocked off, another player is probably using that quest. Wait until it's finished or fails.
What to expect
- Quests are meant to be challenging: time investment, multiple attempts, a few deaths, specific gear, and cross-map travel.
- Dying, disconnecting, logging out, or crashing can fail or reset a quest. Sometimes that's intentional, and sometimes it's a limit of the quest system.
- Staff can't restart quests, advance or restore progress, complete them for you, or compensate for bugged outcomes.
If you get stuck
- Open the Quest HUD and cancel the quest
- Move away from the NPC
- Accept the quest again
Please don't exploit quests or share solutions, locations, or spoilers in Discord or global chat. Quests are meant to be discovered in game.
Traders and the P2P marketTraders are where you cash in your work, not where you skip progression.
If you're coming from another server, note that we don't run a buy-everything economy. Weapons, armor, and high-end gear are mainly earned through AI, quests, exploration, crafting, and trading with other players. Most NPCs here are buyers rather than sellers, and every trader is marked on the map.
- Hunter: pelts, skulls, and animal meat
- Mining Buyer: gems and bars
- Fishing Buyer: whole fish
- Collectable Trader: collectables, postcards, magazines, board games, and trading cards
- Drug Trader: weed bricks, cocaine, and mushrooms
- AI Armband Buyer: armbands taken off dead AI
Vehicles come from the Vehicle Trader, which is split into stalls by tier (C, B, A, and S with helicopters), plus one for base storage and vehicle attachments. For anything else, the P2P market on every server is run by the community, so you buy and sell directly with other players.
Understanding AILearn the types of AI so you can choose your fights.
A small nameplate above an AI's head tells you it isn't a player. Once you know what to look for, you can spot encounters before they spot you.
- Civilian, bandit, and hunter AI: the easiest. Civilians hang around water wells, bandits around bus stops (barricades on Livonia), and hunters around hunting stands. Good for learning how AI behaves.
- Roaming AI: groups of 1 to 3 that travel the map and loot as they go. They're lootable, and ones that live long enough can carry a full kit.
- Military AI: found at military locations, better equipped, and scaled to the area's loot tier. A T4 zone is far more dangerous than a T1 zone.
- High-tier AI (T5+): found in our custom high-tier zones, and smart and very accurate. Bring your best.
- Special AI: Lunatics, Military Outcasts, and Reapers hold their own designated areas on Chernarus, and Livonia's Reapers guard the end-game Castle of the Reaped.
Heli crashes usually have 1 to 2 AI guarding them, and AI don't attack zombies on Chernarus or Livonia. Hordes from The Dark Horde and mutant creatures are tougher still, so scout first, bring extra ammo and medical supplies, and go with a squad. Don't despawn AI on purpose or share DNA Crate and horde locations, since both break the rules.
Staying alive around PvP zonesHow Chernarus and Sakhal mix peaceful survival with high-risk areas.
Chernarus and Sakhal have rotating PvP zones, and Livonia has none. Outside an active zone these servers play like PvE, but inside one other players are fair game, so know where you are before you push in.
How to tell where you are
- Green shield above your hotbar: you're safe from PvP.
- Red soldier icon above your hotbar: you're inside an active PvP zone, and other players can attack you.
- First person only: PvP zones force you into first person, so you can't peek around corners in third person.
- Looting: you may loot bodies and vehicles inside active PvP zones only. Locked vehicles can't be damaged to get inside.
- No combat logging: logging out to dodge a fight, AI, or a restart is against the rules.
- Raids are PvP events: everyone inside the Open Fire Zone of a raid is fair game.
- Sportsmanship: friendly trash talk is fine, harassment isn't.
Go in with a squad, carry only what you can afford to lose, and plan your exit before the shooting starts.
Building a base that lastsStart with a flagpole, build small, and follow the placement rules.
Every base starts with a flagpole, which claims territory and lets you build within its radius. We use BaseBuildingPlus (BBP), which lets you build everything from hidden cabins to multi-story compounds, and it's simpler than it looks.
- Get a workbench. It uses a BBP Book, found most often in industrial zones and garages. You craft building kits there and upgrade them into finished pieces. The BBP guide covers the steps.
- Wood is enough. Pieces can be upgraded to metal and concrete, but our servers are mostly PvE and a base is only raidable when its flag is neglected. Higher tiers are about looks, not defense.
- Start small: a flagpole, a small cabin, storage, then expand. A small finished base beats a giant unfinished one.
- Buy Virtual Storage Barrels. They give you huge storage without lag, and players are expected to move long-term storage into them. Get a vehicle first, because carrying one home on foot is miserable.
Building tips
- Plan the whole layout before spending on upgrades.
- On uneven ground, start your foundations from the highest point.
- Plan doors, vehicle entrances, and storage before you wall everything in.
The rules
- Location: stay 300 meters from military areas and traders, and don't block roads, railroads, or military containers.
- Size: one main base per group, up to 20 meters tall, plus one small outpost once your group reaches Level 5. Big bases hurt server performance, so oversized ones may be downsized or removed.
- Territory: a flagpole claims a 75 meter radius, flags from different groups must be 150 meters apart, and sleeping bags stay within 50 meters.
- Tents: one of each tent type per base.
Keep your flagpole reachable, or staff may have to relocate it. For the full recipe list, see the BBP Wiki.
Flagpoles and territoryBuild a flagpole step by step, claim your land, and keep your base safe from raids.
Your flagpole is the most important thing you'll build. It claims your territory, lets you build, and decides whether your base can be raided. On Is Dead, a base is only raidable when its flag is lowered to 0% and removed from the pole, so a raised flag means a safe base.
Before you start: make a group. You can't place a flagpole or any building piece until you're in a group. Press M, open the Group tab, and create one, even if you play solo.
What you'll need in total
| Item | Amount | Used for |
|---|---|---|
| Short wooden sticks | 3 | Flagpole kit |
| Rope | 2 | Kit and pole |
| Wooden logs | 10 | Base, support, and pole |
| Large stones | 32 | Support |
| Nails | 60 | Pole |
| Metal wire | 1 | Pole |
| A flag | 1 | Raising it claims the territory |
Tools: a sledgehammer, a shovel or pickaxe, and a hammer or hatchet. Mine large stones by hitting boulders with a pickaxe or sledgehammer. Logs and stones are heavy, so a vehicle makes this far easier.
Building it
- Kit: combine 3 short sticks with a rope to make a flagpole kit, then place it where you want your base.
- Base: 1 wooden log, built with a sledgehammer.
- Support: 32 large stones and 6 wooden logs, built with a shovel or pickaxe.
- Pole: 3 wooden logs, 60 nails, 1 rope, and 1 metal wire, built with a hammer or hatchet.
- Flag: attach a flag and raise it. Raising takes several actions, so keep going until it's at the top.
Territory rules on Is Dead
- Your flag claims a 75 meter radius, from 30 meters below to 30 meters above the pole. Flagged items show a flag icon on their nameplate.
- Anything built outside your territory becomes unflagged and despawns after about two weeks.
- Flags from different groups must be at least 150 meters apart, and your sleeping bags must be within 50 meters of your flag.
- Build at least 300 meters from military areas, encampments, and traders.
- The flagpole must be outside any locked area and reachable by raiders. If it isn't, staff may move it.
- Each group gets one main base. At group Level 5 you can place one extra flagpole for a small outpost.
Keep it raised. Flags slowly lower over time, so raise yours back to the top whenever you're home. A lowered flag alone doesn't make you raidable, but a lowered and removed one does.
BaseBuildingPlus (BBP) guideWorkbench, kits, tiers, snapping, recipes, and fixes for common problems.
Is Dead uses BaseBuildingPlus (BBP) for base building. Instead of vanilla fences, you build foundations, walls, floors, roofs, doors, and stairs that snap together. It looks complicated, but every piece follows the same pattern: craft a kit, place it, build the frame, then build the tier you want.
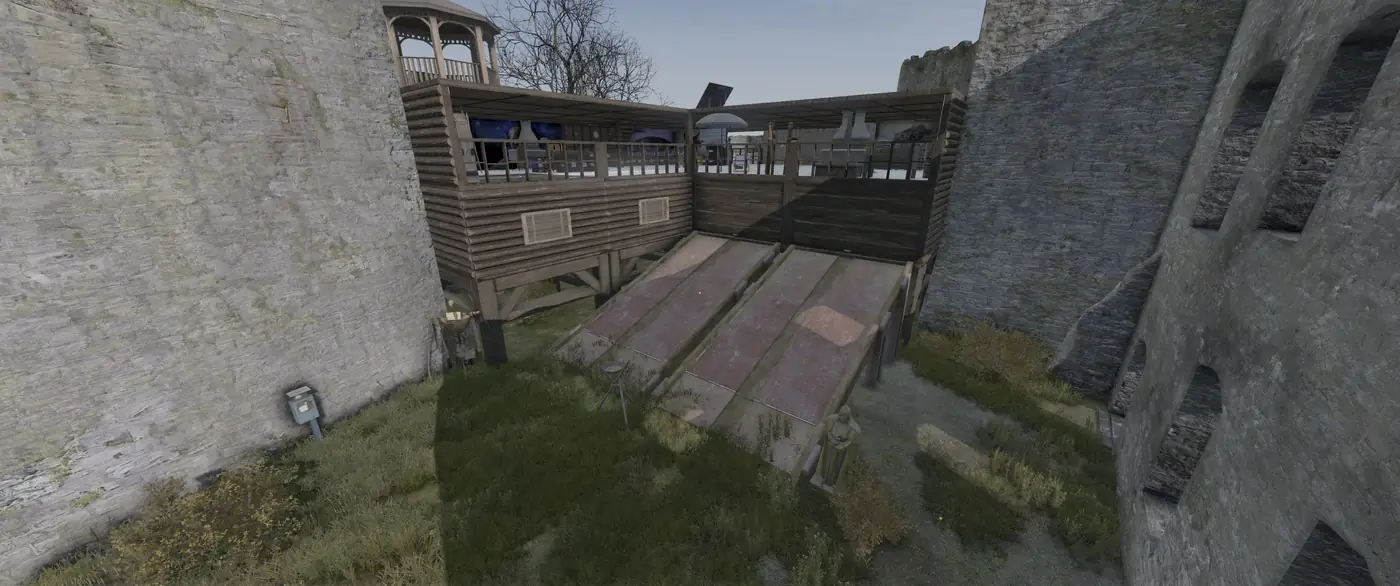
1. Get a flagpole and a group
You can't place BBP pieces until you're in a group, and anything built outside your flag's territory despawns. If you haven't yet, start with the flagpole guide above.
2. Make a workbench
- Find a BBP 2.0 Book. They turn up most often in industrial zones and garages.
- Combine the book with 5 wooden planks to make a workbench. You get the book back, so place the workbench and attach the book to it.
- Most kits cost 3 planks and 3 nails. Attach the planks and nails to the workbench, walk up to it, and use the Read action (F) to pick a kit.
- A step ladder kit (10 planks and 10 nails) helps you reach higher floors while building.
3. Place and build
- Take a kit in your hands to see its hologram. Press ↓ to turn on snapping, then scroll the mouse wheel to cycle through attachment points.
- Use PgUp and PgDn to raise or lower the hologram until it lines up.
- Once placed, attach the materials and build the frame, then build the tier you want on top.
4. Tiers
- Wood (T1): logs or planks plus nails. This is what most players use.
- Metal (T2): sheet metal and nails, built over a finished T1 piece.
- Concrete (T3): concrete bricks and mortar mix, built with a shovel or pickaxe.
On Is Dead, bases can only be raided when the flag is lowered and removed, so higher tiers are about looks rather than defense. Wood is enough. Save your materials for expanding.
Common recipes
Default BBP values. Server settings can change them, so the workbench in game always has the final say.
| Piece | Frame | Wood (T1) | Metal (T2) | Concrete (T3) |
|---|---|---|---|---|
| Foundation | 2 logs, 10 nails | 8 planks, 10 nails | 3 sheet metal, 10 nails | 2 concrete bricks, 1 mortar |
| Large wall | 5 planks, 10 nails | 2 logs or 6 planks, 10 nails | 4 sheet metal, 10 nails | 3 concrete bricks, 1 mortar |
| Small wall | 3 planks, 10 nails | 1 log or 3 planks, 10 nails | 2 sheet metal, 10 nails | 2 concrete bricks, 1 mortar |
| Large floor or roof | 5 planks, 10 nails | 8 planks, 10 nails | 3 sheet metal, 10 nails | 2 concrete bricks, 1 mortar |
| Large door | 5 planks, 10 nails | Frame: 2 logs or 5 planks, 10 nails. Door: 5 planks, 10 nails | Frame: 3 sheet metal, 10 nails. Door: 5 sheet metal, 15 nails | Not available |
| Large window | 5 planks, 10 nails | 2 logs or 8 planks, 10 nails | 4 sheet metal, 10 nails | 3 concrete bricks, 1 mortar |
| Large stairs | None | 5 planks, 10 nails | None | None |
For every piece, including gates, garages, ramps, slopes, and fences, see the BBP recipe wiki.
5. A first base that works
- Foundations, starting from the highest point if the ground is uneven
- Walls, leaving gaps where doors and a vehicle entrance will go
- A door with a codelock
- A roof
- Storage: Virtual Storage Barrels hold a huge amount without lag
Then expand a little at a time. A small finished base beats a giant unfinished one, and big bases hurt everyone's frame rate. Bases are capped at 20 meters tall.
Fixes for common problems
- Can't place anything: you're not in a group yet. Press M and create one on the Group tab.
- Can't walk through your door: usually desync. Remove the codelock and any Christmas lights, then use the mouse wheel on the door and choose Force Synchronization.
- Items fall through the floor: a known BBP bug that hasn't been fixed upstream. Keep valuables in storage, not on the floor.
- The BBP well: it always despawns, so don't build it.
ZM Workbench crafting guideWorkbench types, modules, power, consumables, and how to track materials.
The ZM Workbench is Is Dead's advanced crafting system. It turns materials you gather into tools, gear, and upgrades you can't find by looting. Every recipe lives inside the workbench menu, so once you know how the bench works, the rest is gathering.
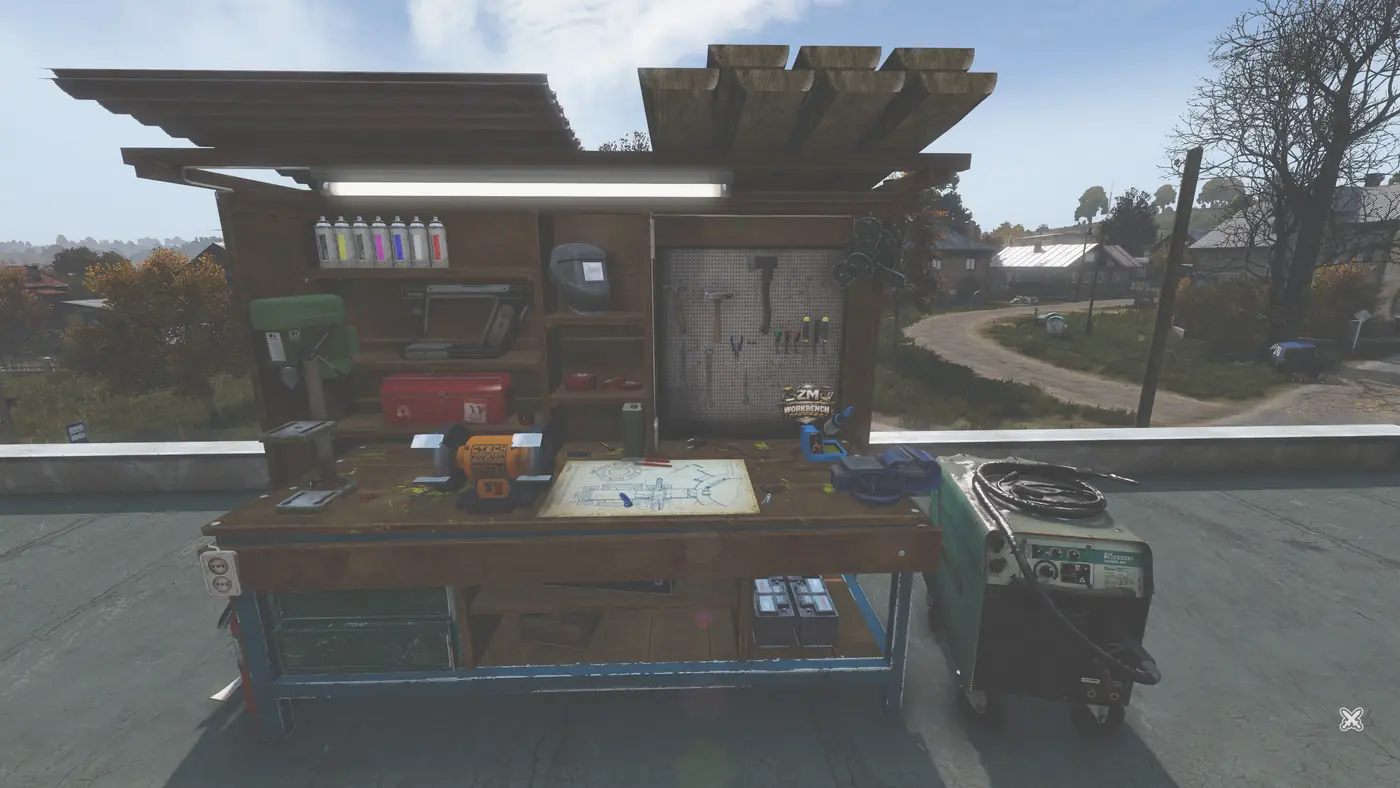
Getting a workbench
Workbench Kits spawn as loot in industrial zones and sheds, anywhere industrial loot can turn up. Grab one, take it home, and place it inside your base.
Two kinds of workbench
- Public workbench: every module is already built in. Walk up and craft.
- Modular workbench: placed from a Workbench Kit. It starts bare, and you unlock more recipes by attaching modules.
Modules and what they unlock
| Module | Used for | Wears out |
|---|---|---|
| Drill press | Metal working and drilling | Drill bits |
| Grinder | Sharpening, cutting, and grinding | Grinding discs |
| Vice | Holding items and bending metal | None |
| Soldering station | Electronics and wire work | Soldering tips |
| Welder | Joining and repairing metal | Welding wire |
| Sewing machine | Fabric and leather | None |
How crafting works
- Tools go inside the bench. Recipes can call for normal tools like a handsaw, hammer, or screwdriver, but they only count when they're stored in the workbench. Tools take damage with each craft, so keep spares.
- Some recipes need power. If a recipe won't start, check whether it needs electricity and power the bench.
- Consumables run out. Drill bits, grinding discs, welding wire, and soldering tips wear down over time. Carry replacements before a big crafting session.
- Queue it up. You can queue several crafts and let the bench work through them.
- Variants: some recipes can produce different colors or styles, and the bench comes with spray cans in seven colors.
Finding materials
- Track a recipe to see which ingredients you already have across your inventory.
- Ping materials to find tracked items near you. It's the fastest way to sweep a town for what you're missing.
Tips
- Put your workbench inside your base so tools and consumables stay with it.
- Browse the recipe list before you go looting. Knowing what you need turns junk into targets.
- Recipes, craft times, and power needs are set by the server, so the in-game list is always the source of truth.
Cannabis Plus: growing, drying, and sellingStrains, drying posts, the processing bench, and turning buds into bricks for cash.
Cannabis Plus adds a full production loop to Is Dead: grow plants, dry them, bag the buds, press them into bricks, and sell the bricks to the Drug Trader at the trader hub. It's slow to set up, but once it's running it's a steady income.
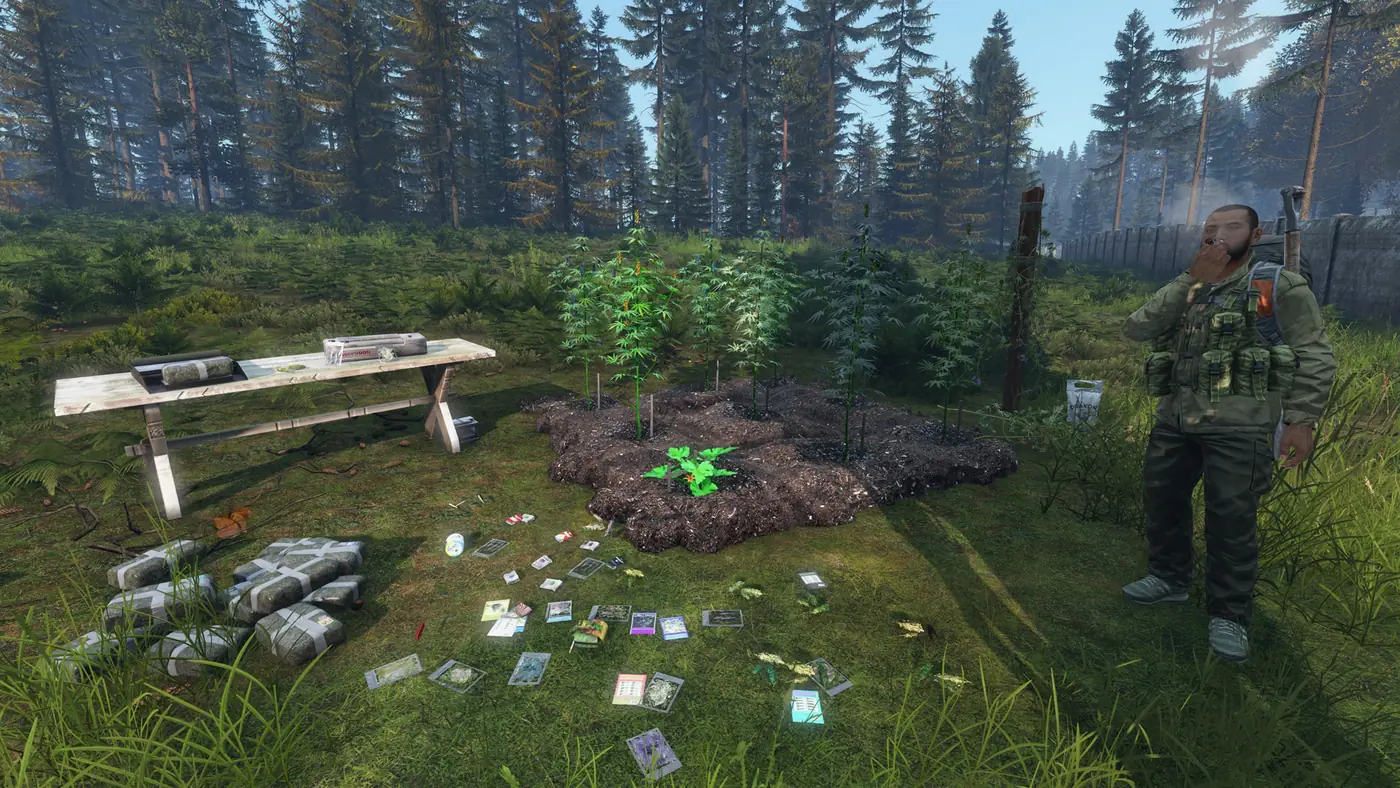
Strains
There are several strains, including Skunk, Blue God, Purple Kush, Stardawg, S1, Future, Nomad, and Black Frost. Each has its own grow time, crop yield, and seed yield, and each hits differently when smoked.
The production loop
- Grow. Find seeds in towns, or by hand looting kitchen items. Plant them, then harvest the grown plants. Harvests also give you seeds to replant.
- Dry. Hang raw plants on a drying post and start drying. You can't take plants off while they dry. When it's done, dried buds appear in the post's inventory. The post can't be picked up, so place it where you'll keep it.
- Bag. Combine at least 2 buds with an empty bag to fill a bag.
- Brick. Combine at least 16 filled bags with duct tape (25% or more) to wrap a brick.
- Sell. Bricks go to the Drug Trader at the trader hub.
The cannabis workbench
Once you're producing in volume, build the processing bench to automate bagging and bricking.
- Craft a Cannabis Workbench Kit from 10 wooden planks and 20 nails, then place it.
- Attach a wrapper, a bagger, empty bags, plastic wrap, and your buds. Depending on server settings it may also need a large (vehicle) battery for power.
- Start production with the in-world action. The bench turns buds into bags, then bags into bricks using plastic wrap. You can stop it at any time.
- If bricks stop coming out, check the wrapper isn't ruined and that you still have plastic wrap and battery charge.
Other things you can make
- Joints: a bud and rolling papers. You can also pack joints into an empty cigarette pack.
- CBD crude oil: S1 buds and disinfectant alcohol.
Smoking
Smoking makes you stoned for about 30 seconds. It drains your water and can make you cough or laugh. On Livonia and Sakhal that matters: Inedia infected react to coughing and laughter, so don't light up with zombies nearby.
Tips
- Grow inside your territory so your setup stays flagged and doesn't despawn.
- Stock empty bags and duct tape or plastic wrap before harvest day.
- A vehicle helps a lot when hauling bricks to the trader.
Inedia survival guide: pain, injuries, and smarter infectedHow pain works on Livonia and Sakhal, how to treat each injury, and how to avoid the infected.
Livonia and Sakhal run Inedia Pain and Inedia Infected. Together they make injuries matter and turn zombies from a nuisance into a real threat. Here's what changes and how to stay alive.
How pain works
Each limb (head, torso, arms, and legs) has its own pain level from 0 to 100%. Pain causes the debuffs, not the injury itself, so painkillers make debuffs go away even before an injury heals. Pain fades slowly on its own.
| Level | Pain | What it feels like |
|---|---|---|
| Yellow | 10–30% | Minor: some weapon sway, slower movement, or stamina loss depending on the limb |
| Orange | 30–50% | Serious: noticeably slower, can't jump high obstacles with bad legs, weaker melee |
| Red | 50–100% | Severe: can't sprint, constant shock, and above 90% you start losing health |
What pain does to each limb
- Arms: weapon sway, weaker melee, no combo attacks, and at higher levels you can't stun infected.
- Legs: slower movement, then no high jumps, then no sprinting, plus shock while moving.
- Torso: stamina drain, and at extreme pain you're forced to crouch.
- Head: hearing things that aren't there, vomiting, blurred vision, and at extreme pain you pass out.
Injuries and how to treat them
| Injury | What it does | Treatment |
|---|---|---|
| Fracture | Keeps pain at red until splinted, orange once splinted. Triples shock from pain. | Splint (arms and legs) or Splint Kit (any limb). Calcium caps speed up healing. |
| Deep wound | Keeps pain at red until bandaged, orange once bandaged. | Bandage, or better, Hemostatic Dressing. Stitch it with a Surgical Kit (about 90% success) or a sewing kit (about 30%). Tranexam speeds healing. |
| Bullet wound | Pain can't drop below yellow, then gets worse over time and causes heavy metal poisoning. | Extract the bullet. You need Morphine, Tramadol, or to be unconscious first. A Surgical Kit works best. A knife works rarely and costs a lot of blood. |
| Internal bleeding | From gunshots or stabs to the torso. You slowly bleed out until it's fixed. | Morphine plus a Surgical Kit, with a low success rate and heavy blood loss. Good body armor prevents it. |
Medical items worth carrying
- Morphine: removes all pain for 90 seconds and allows every surgery.
- Tramadol: halves pain for 3 minutes and allows stitching and bullet extraction.
- Painkillers or codeine: cut pain by 30% for 5 minutes and allow stitching.
- Hemostatic Dressing: stops bleeding for an hour and triples limb healing.
- Surgical Kit: the best tool for stitching, bullets, and internal bleeding.
- Splint Kit: stabilizes any limb and triples bone healing.
- Tranexam: slows bleeding and reduces blood loss during surgery.
- Sorbifer Durules: speeds up blood regeneration.
- Calcium caps: double bone healing speed.
- Metoclopramide: stops vomiting.
Vanilla bandages, rags, splints, and sewing kits still work, just less well. In a pinch, vodka dulls pain too.
Smarter infected
Inedia infected see, hear, and smell better, hit harder, and search for you for a long time after they lose sight of you.
- They react to noise and light: doors slamming, car engines and headlights, generators, fireworks, flashlights, and campfires at night. Close doors quietly.
- They react to you: coughing, sneezing, laughing, vomiting, and groaning in pain all draw them in. Wounded players are easier to smell, and your scent carries on the wind.
- They call for help: a zombie that spots you screams, and the scream pulls in others nearby.
- They're harder to escape: they can climb up and down obstacles, knock you off them, and break doors down.
- They can hurt you through blocking: they can stun you even when you block, break limbs, cause pain, and pass on diseases.
- They see worse at night but still hear well.
- Loot needs a search: you have to search a body to loot it.
- Vehicles aren't safe: hitting creatures slows and damages your car, and zombies can reach you through broken windows.
Staying alive
- Carry a splint, a good bandage, and painkillers at all times. Add a Surgical Kit and Morphine once you find them.
- Treat pain before you fight. Arm pain wrecks your aim and melee.
- Move slowly in towns, avoid sprinting past groups, and don't fire unless you have to. Every noise brings more.
- At night, kill your lights near infected.
- Don't head out sick. Coughing and sneezing give you away.
Vehicles, garages, and flyingKeep your vehicles safe and know what happens when they aren't.
A vehicle opens up the map, with mobile storage, faster travel, and easier questing and hauling. We have a large vehicle collection from RUSForma on Chernarus, Fortune Vehicles on Livonia, vanilla vehicles on Sakhal, and helicopters from Red Falcon Flight Systems, so here's how to keep them safe.
- Garages: up to 10 vehicles in a personal garage and 20 in a group garage. Store vehicles and helicopters when you're not using them.
- Abandoned vehicles: they can be posted in the 24-hour deletion channel, then repossessed and bought back through Jack's Repo Services.
- Losses: replacements only cover confirmed server crashes. Over-revving, reckless driving, and no-fly zone losses aren't covered.
- Flipped over? Press F6 from the driver's seat to flip a vehicle or helicopter upright (it won't work from a passenger seat), or use road cones from vehicle traders.
Flying is at your own risk, so respect no-fly zones and take extra care when the server is busy.
How progression worksWhy you can't buy your way to the best gear, and how to earn it.
High-end gear can't be bought from a trader. You earn it in the world, which keeps endgame content relevant all wipe.
- Events: heli crashes, airdrops, the endgame ticket system, and quests all lead to loot. Chernarus adds hacked crates.
- T5+ zones: custom high-tier locations with dangerous encounters and rare loot, built for experienced survivors.
- Crafting: the ZM Workbench turns resources into upgrades and gear you can't find by looting alone.
- Economy: hunting, mining, Drugs Plus and Cannabis Plus, and the P2P market all let you fund your kit.
Mix them. Run events with friends, use the economy to fund your kit, and take on harder zones as you improve.
No guides match that search. Try another word, or ask in Discord.
Got a question these don't answer?
Check the FAQ, ask in Discord, or open a ticket for help.
Open Discord